
Your Essential Guide to Certificate of Insurance Templates
Master the certificate of insurance template with our guide. Learn to avoid common errors, streamline workflows, and ensure accuracy for your insurance agency.
Jan 20, 2026
A certificate of insurance template is a standardized, pre-formatted document that serves as proof of insurance coverage. Think of it as a snapshot of an insurance policy, neatly outlining the most critical details—like coverage types, policy limits, and effective dates—in a consistent and easy-to-read layout. It’s the go-to document for verifying that a business or individual has the right insurance before a project kicks off or a partnership begins.
Why a Solid COI Template Is Non-Negotiable
Staring at a Certificate of Insurance (COI) can sometimes feel like trying to decipher a secret code. Every box, date, and line of text represents a crucial piece of information that shields businesses from massive financial risk. A well-designed certificate of insurance template cuts through the complexity, turning a potential headache into a powerful tool for your operations.
This isn’t just another piece of paper. It’s the official, universally accepted proof that a business is properly insured. When a contractor walks onto a job site or a new vendor is brought on, the COI is the first line of defense against liability. It’s the handshake that confirms if an accident happens, a policy is there to respond.
The Blueprint for Accuracy and Efficiency
The best way to think about a COI template is as a blueprint for proving coverage. Just as a construction crew needs a detailed blueprint to build a structure correctly, an insurance agency needs a solid template to issue COIs accurately and consistently. Without that structure, the process quickly becomes chaotic and dangerously prone to error.
This kind of standardization is essential for a few key reasons:
Boosts Accuracy: A consistent format ensures no critical details, like policy numbers or coverage limits, are ever missed.
Delivers Faster Service: When the layout is predictable, account managers and CSRs can generate and issue certificates much more quickly, keeping clients happy.
Reduces E&O Exposure: Simple clerical mistakes on COIs are a primary driver of Errors & Omissions (E&O) claims. A reliable template takes the guesswork out of the process, which is where those costly mistakes often happen.
The Scale of the Challenge
The need for this kind of efficiency becomes crystal clear when you look at the numbers. Across the United States, insurance agencies issue over 400 million COIs annually, placing it among the most common documents in the entire P&C sector. This staggering demand creates a serious operational bottleneck, especially since the process is still so manual for many. In fact, account managers often report that COI-related tasks chew up 20-30% of their total servicing time, leading to delays and a higher risk of human error. You can get a better sense of these demands by exploring the scale of the global insurance market.
A Certificate of Insurance isn't just an administrative task; it's a core risk management function. Every certificate issued is a promise of protection, and a flawed template can turn that promise into a liability.
Ultimately, a strong certificate of insurance template provides the backbone needed to manage this high-stakes, high-volume workflow. It helps establish a repeatable process that protects both the agency and its clients from the financial fallout of incorrect or incomplete information. By building on this solid foundation, agencies can shift from a reactive, error-prone system to one that is proactive, compliant, and ready for smarter, automated solutions.
Navigating the ACORD 25 Form, Field by Field

At first glance, the ACORD 25 can look a bit overwhelming. Its dense layout is packed with boxes, codes, and legal-sounding terms. But think of it less like a complicated tax form and more like a map. Each field is a landmark on the path to verifying coverage, and once you know what you’re looking for, the journey becomes second nature.
Let's break down the ACORD 25 into its core components. By tackling it piece by piece, you’ll see it’s really just a simple, manageable checklist designed to communicate complex information clearly and accurately.
The Top Section: Identifying the Key Players
The top of the form is all about setting the stage. It answers the fundamental questions: Who are we talking about, who is providing the coverage, and who is issuing this proof? Getting this part right is the bedrock of a valid certificate.
Date: This isn't the policy start date; it's the date you issue the certificate. It acts as a timestamp, creating a point-in-time snapshot of your client's coverage as of that day.
Producer: That’s you! This is where your agency's full legal name and address go. If you're using an Agency Management System (AMS), this info is usually pulled in automatically.
Insured: This is your client, the business or individual whose coverage is being verified. The name and address here must match their policy declarations page exactly. No exceptions. Even a small discrepancy can cause rejection.
Insurer(s) Affording Coverage: Here, you'll list the insurance carriers backing each policy. Every insurer gets a letter (A, B, C, etc.), which you'll use to link them to the specific policies in the "Coverages" section below.
The Coverages Section: The Heart of the COI
This grid is the main event. It’s where you lay out the specific types of coverage, policy numbers, and—most importantly—the coverage limits. This is arguably the most critical part of any certificate template because it’s where the proof is. Precision is everything here; a typo or incorrect limit can create a massive E&O exposure for your agency.
Each row represents a different type of coverage. To list a policy, you have to populate the "INSR LTR" (Insurer Letter) column with the corresponding letter you assigned in the "Insurer(s)" section up top. If a policy isn't active, just leave that line blank.
This detailed breakdown shows what each field on the standard ACORD 25 form represents and the typical information needed to complete it accurately.
Key Fields on the ACORD 25 Template
Field Name | What It Means | Common Information Required |
|---|---|---|
INSR LTR | Insurer Letter | The letter (A, B, C) corresponding to the carrier listed at the top. |
TYPE OF INSURANCE | The coverage category | General Liability, Auto Liability, Workers Compensation, etc. |
ADDL INSRD / SUBR WVD | Additional Insured / Subrogation Waived | Checkboxes indicating if these endorsements apply to the specific policy line. |
POLICY NUMBER | The unique identifier for the policy | The full, active policy number. Double-check for accuracy. |
POLICY EFF / EXP DATE | Policy Effective / Expiration Date | The start and end dates of the current policy term (MM/DD/YYYY). |
LIMITS | The maximum payout amounts | Dollar amounts for each coverage sub-category (e.g., Each Occurrence, General Aggregate). |
Understanding these fields is key to avoiding compliance issues and ensuring the certificate accurately reflects the insured's coverage.
Finalizing the Details: Description and Certificate Holder
The bottom of the form is where you add context and officially name the recipient. This is where you address any special requirements from the requesting party.
Description of Operations / Locations / Vehicles: This is your free-text box for any special wording the certificate holder demands. It's often used to reference a specific contract, project number, or job site. This is also where you might reference specific endorsements, like “Additional Insured” status, but only if that endorsement actually exists on the policy. Never add language here promising coverage that isn't in place.
Certificate Holder: This is the person or company asking for proof of insurance. Their full legal name and mailing address go here. An incorrect or incomplete name can make the certificate useless for its intended purpose.
Cancellation: This clause is standard ACORD language. It states the insurer will "endeavor to mail" a cancellation notice but is not obligated to do so. This wording is non-negotiable and should never be altered.
By approaching the ACORD 25 field by field, you turn a daunting task into a logical process. Each section flows into the next, building a complete and accurate picture of coverage that protects your client, satisfies the holder, and minimizes your agency's risk.
Mastering Holder Language and Endorsements
Beyond the basic boxes on an ACORD 25, you get into the real meat of the certificate: the specific language the holder is demanding. This is the moment a simple certificate of insurance template transforms from a routine form into a document with serious legal weight. Get this part wrong, and you're looking at one of the fastest ways to trigger a major Errors & Omissions (E&O) claim.
The certificate holder is the one asking for proof of insurance—it could be your client’s new business partner, a general contractor, or a landlord. It's crucial to remember they aren't automatically covered by your client's policy just because their name is on the certificate. Their contracts, however, almost always demand specific coverage extensions, which need to be confirmed with precise wording on the COI and, critically, backed by actual policy endorsements.
Decoding Key Endorsement Requests
When you get a set of insurance requirements from a holder, you’ll start seeing the same phrases pop up again and again. These aren't just industry buzzwords; they are legally significant requests that change who the policy protects. Nailing down what they mean is your first step toward compliance.
Three of the most common requests you’ll see are:
Additional Insured: This extends your client’s policy to cover the certificate holder directly. It essentially gives them a right to protection under the policy for claims related to your client's work.
Waiver of Subrogation: This is an agreement where your client's insurance carrier gives up its right to sue the certificate holder to recover money it paid out on a claim, even if the holder was at fault.
Primary & Noncontributory: This is a powerful one-two punch. "Primary" dictates that your client's policy must respond and pay first, before the holder’s own insurance policy is touched. "Noncontributory" means the holder's policy won't be asked to chip in.
A COI is a snapshot of the policy, not the policy itself. Stating that an entity is an "Additional Insured" in the description box without a corresponding endorsement on the policy is a serious misrepresentation of coverage.
This distinction is everything. Just typing "Additional Insured" into a certificate of insurance template without confirming the policy has the right endorsement creates a massive liability. You're promising protection that simply doesn't exist, leaving your agency completely exposed when a claim inevitably comes in. In fact, industry data consistently shows that gaps between what a COI says and what the policy actually covers are a top driver of E&O claims.
The Verification Process You Cannot Skip
Before any COI with special holder language leaves your office, you absolutely must follow a strict verification process. This isn’t just a "best practice"—it's your core defense against E&O risk. You’re not just filling out a form; you are legally attesting that the protections requested are active and in force.
Your verification checklist should always include these steps:
Review the Contract: Start with the source. Get the contract between your insured and the certificate holder and find the exact insurance requirements. Don't guess.
Check the Policy for Endorsements: Now, dig into your client’s policy. You're hunting for the specific endorsement forms that grant Additional Insured status, waive subrogation, or provide Primary & Noncontributory coverage. Sometimes it’s a specific endorsement for a single entity, other times it’s a "blanket" endorsement that applies automatically when required by contract.
Confirm the Language Matches: Finally, read the endorsement itself. Make sure the wording on the endorsement actually delivers what the contract demands. Some endorsements are riddled with limitations or specific triggers that must be met.
Only when you've confirmed the right endorsements are physically attached to the policy can you add that language to the certificate of insurance template. This diligent, step-by-step check is what separates a professional from a liability. It ensures the COI is an honest reflection of coverage, protecting your client, the holder, and your agency from the painful fallout of misrepresentation.
Avoiding Common—and Costly—COI Mistakes
Even with a perfect certificate of insurance template, human error is always lurking in the background. A single slip-up—a mistyped policy number, an incorrect effective date, or a misunderstood endorsement—can completely dismantle the protection a COI is supposed to confirm. These aren't just small clerical mistakes; they can directly lead to denied claims, messy legal battles, and serious Errors & Omissions (E&O) exposure for your agency.
This means that preventing errors isn't just a "best practice," it's a fundamental part of running a sound operation. It’s about shifting your mindset from simply filling out a form to treating every certificate as a legally binding document. Think of it like a pilot's pre-flight checklist—it's a routine designed to catch small issues before they turn into absolute disasters.
Misrepresenting Coverage Limits
One of the most dangerous mistakes you can make is putting coverage limits on the COI that don't actually match the policy. This usually happens when a CSR is rushing to hit a deadline or pulls information from an old declarations page by accident.
What Went Wrong: A contractor's agreement demanded a $2,000,000 general aggregate limit. The CSR, working from an old summary, plugged that number into the certificate of insurance template. The problem? The client’s current policy only covered $1,000,000.
How to Get It Right: Make it a non-negotiable rule: always pull coverage details directly from the active policy declarations page in your Agency Management System (AMS). Every single time. Never rely on your memory, old certificates, or even what the client tells you. Verification is your only real defense.
Failing to Attach Mandatory Endorsements
Another all-too-common error is checking a box on the COI for an endorsement that isn't actually attached to the policy. Saying a certificate holder is an "Additional Insured" without the corresponding policy form to back it up is a blatant misrepresentation of coverage.
This is a massive headache for the entire industry. Manually managing COI templates has been a persistent challenge, with U.S. agencies issuing over 400 million of them every year. It’s a tedious process that not only eats up CSR time but also opens the door to huge risks. In fact, industry data shows E&O claims tied to COI errors can run into the millions, with some manual reviews finding error rates as high as 15-20% due to mistakes with ACORD forms and endorsements. You can find more details on transforming COI management at exlservice.com.
An issued COI is your agency's official statement of fact. If that certificate promises coverage that doesn't exist, the agency can be held liable for the gap. This is a primary driver of E&O claims.
Using Incorrect or Expired Policy Dates
Issuing a COI with the wrong effective or expiration dates is another classic blunder. This often happens around renewal time or when a policy has been cancelled and then reinstated.
What Went Wrong: A certificate was issued on March 15th showing a policy term from January 1st to December 31st. But the policy had actually lapsed on March 1st for non-payment and hadn't been reinstated yet. The COI gave a false sense of security, showing coverage that wasn't there.
How to Get It Right: Before you hit "send" on any certificate, do a quick check in your AMS to confirm the policy status is "Active." This one simple step ensures the dates you put on the certificate of insurance template reflect a policy that is actually in force.
By treating each of these potential slip-ups with the seriousness they demand, agencies can build a much stronger defense against liability. A disciplined review process—where every limit, date, and endorsement is double-checked against the source policy—is the only way to make sure the COIs you issue are both accurate and trustworthy.
How Automation Changes the COI Game
Knowing your way around a manual certificate of insurance template is a foundational skill, but let's be honest—it’s not where your agency makes its money. In today's fast-paced world, the constant flood of COI requests can bog down even the most efficient teams, turning a critical client service into a monotonous administrative chore. This is exactly where automation is stepping in, not just to speed things up, but to fundamentally change how your agency operates.
Instead of manually punching in data, imagine a system that talks directly to your Agency Management System (AMS). This is the core of modern COI automation. It creates a secure, real-time link to your client’s policy data, pulling exactly what’s needed for each request. The days of tedious data entry—and the human errors that come with it—are over. Every certificate is a perfect reflection of the most up-to-date coverage.
The New Automated Workflow
Picture this: a client emails a COI request. Instead of that message languishing in an inbox until a CSR gets to it, an automated system jumps on it instantly. This isn't science fiction; it's how forward-thinking agencies are getting a serious leg up on the competition. What used to be a multi-step manual process now happens seamlessly in the background.
This updated, automated process is surprisingly straightforward:
Request Received: The journey begins the moment a request hits your inbox or comes through a client portal.
AI Interpretation: An AI teammate reads and understands the request—identifying the insured, the certificate holder, and any special language needed.
AMS Data Sync: The system then pulls the active policy details straight from your AMS, including all coverages, limits, and policy numbers.
Coverage Validation: Here's the critical part. It cross-references the holder's requirements against the insured's actual policy to make sure endorsements for things like "Additional Insured" or "Waiver of Subrogation" actually exist.
COI Generation: Once everything checks out, the system generates a perfect, compliant COI using the right template.
Automated Delivery: The final certificate is sent directly to the client, often within just a few minutes of their original request.
Automation transforms COI issuance from a repetitive, manual grind into a strategic, high-speed service. This shift frees up your team to focus on high-value client advising and relationship building, not administrative paperwork.
This isn’t just about speed, either. It’s about building a more resilient, compliant workflow. By systematically checking every single detail against the policy on record, you drastically reduce your agency’s E&O exposure from manual typos and mistakes.
From Tedious Task to Strategic Advantage
Moving from manual COI processing to an automated system delivers a huge boost in efficiency. Agencies that have made the switch often report stunning reductions in the time spent on servicing tasks. For instance, platforms like Acolite are helping agencies save up to 80% of the time they used to spend on routine work like COIs, renewals, and marketing.
What do you do with all that reclaimed time? That’s the real prize. It lets your producers and CSRs break free from the administrative hamster wheel and focus on what truly grows the business: advising clients, deepening relationships, and winning new accounts.
The visual below breaks down the essential manual checkpoints—Review, Verify, and Attach—that automation handles instantly to prevent costly errors.
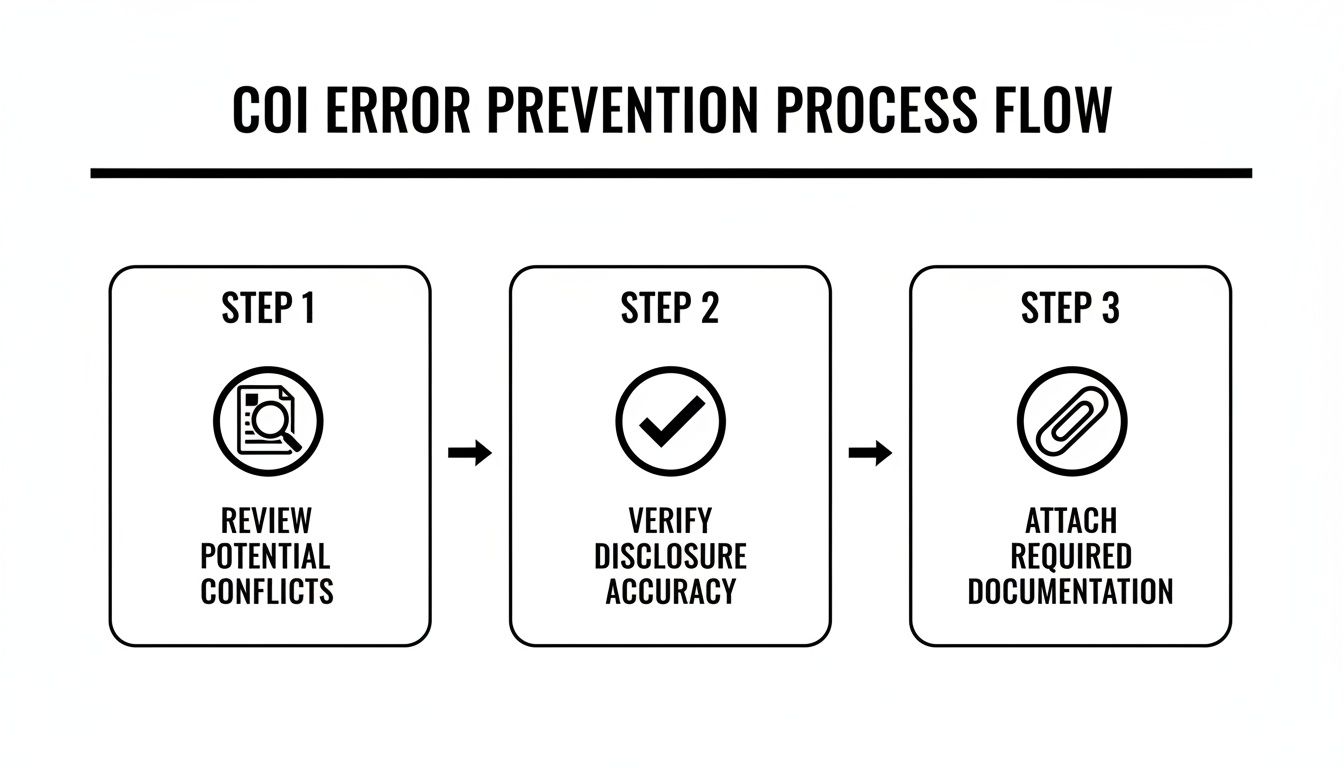
This process flow shows how a structured review is your best defense against errors—a defense that automation makes both faster and more reliable. By baking these checks right into the workflow, your agency can ensure every certificate of insurance template is filled out with precision and compliance. You’re not just doing the same work faster; you’re building a more accurate, scalable, and ultimately more profitable agency.
Answering Your Top Questions About COI Templates
As you start working with certificate of insurance templates day-to-day, you’re bound to run into some questions. This corner of the insurance world is filled with specific terms and compliance rules that can feel a little dense at first. To help you navigate it all, we’ve put together some straight-to-the-point answers to the questions we hear most often from CSRs, account managers, and producers.
Think of this as your quick-reference guide. It’s here to give you reliable, clear information on the fundamentals of COI management, so you can handle every request with confidence.
Can You Create Your Own COI Template?
This question comes up a lot, and the answer is a hard no. It might seem easier to whip up a custom template for your agency, but trust me, it's a huge compliance risk. The insurance industry relies on standardization, and ACORD forms are the universal language for sharing coverage information.
If you go rogue and create your own version, you open the door to some serious problems:
It Has No Legal Standing: A homemade template won't be recognized by carriers, legal teams, or most certificate holders. It’s basically useless.
You Risk Misrepresentation: Changing the standard layout or wording could accidentally misrepresent what’s actually covered, creating a massive E&O exposure for your agency.
You'll Have Compliance Problems: State insurance departments have strict rules about how coverage information is presented. ACORD forms are specifically designed to meet them.
The bottom line? Always stick to the official ACORD forms. They are the industry standard for a reason—they provide a consistent, compliant, and legally sound way to prove insurance coverage.
What Is the Difference Between ACORD 25 and ACORD 28?
The ACORD 25 is the go-to certificate for liability, but it’s not the only one you'll come across. The ACORD 28 is another common form, but it's used for something entirely different. Knowing which is which is critical to getting the job done right.
ACORD 25 (Certificate of Liability Insurance): This is the form we've been talking about. It’s a snapshot of an insured's liability coverage—things like General Liability, Auto Liability, and Workers' Comp. You use it to prove to a third party that your client has protection if they're responsible for bodily injury or property damage.
ACORD 28 (Evidence of Commercial Property Insurance): This form, on the other hand, shows proof of property insurance. It's used to verify that a building or other business property is insured against physical damage. The certificate holders are typically lenders or mortgagees who have a financial stake in that property.
Here’s a simple way to think about it: ACORD 25 proves you can cover damages you cause to others, while ACORD 28 proves your own stuff is covered. Mixing them up will get the certificate rejected and cause unnecessary delays.
Is a Certificate of Insurance a Legally Binding Contract?
This might be the most important thing to get right: a Certificate of Insurance is not a contract. It can't create, change, or expand the coverage provided by the actual insurance policy. Its job is purely informational.
A COI is simply evidence that an insurance policy was in place on the date the certificate was issued. The policy itself—with all its endorsements, exclusions, and conditions—is the only legally binding agreement between the insurer and the insured.
This distinction has huge implications for your work. You can't just type new coverage terms into the "Description of Operations" box and make it so. For example, writing "Certificate holder is an additional insured" means nothing unless there's an actual Additional Insured endorsement on the policy to back it up.
Promising coverage on a COI that the policy doesn’t provide is a surefire way to get hit with an E&O claim. Always remember: the policy is king, and the COI is just its messenger.
Ready to eliminate manual errors and save up to 80% of the time your team spends on COIs and other servicing tasks? Acolite provides AI teammates that integrate directly with your AMS to generate perfect, compliant certificates in minutes. Discover how Acolite can automate your agency's most repetitive workflows.